Inhaltsverzeichnis
Opencast
With Opencast, instructors (role “Teacher”) can:
- make existing videos available in the Moodle course room or easily
- produce new videos with Opencast Studio and make them available in the Moodle course room.
- Videos can be organized into series and.
- series can be imported into other Moodle courses.
Learn more about Opencast:
- Opencast Steckbrief at e-teaching.org
The integration of Opencast into Moodle is under constant development. We'll keep you posted on the latest developments.
Browser recommendation
We recommend current versions of Mozilla Firefox, Chrome, or Microsoft Edge as browsers. Users launching an LTI application with Safari 11 and the “Prevent Cross-Site Tracking” option enabled will not be authenticated in Opencast, as Safari prevents the Opencast session cookie from being set.
Add block "Opencast Videos" to course
To use Opencast, add the block “Opencast Videos” to the course: “Turn on editing”, then select “+ Add Block” in the very bottom of the left navigation bar, there select “Opencast Videos”.
 \
picture: Block “Opencast Videos” - only the role “Teacher” can see the block.
Upload videos
Opencast allows you to upload an existing video (up to 1 GB) to make it available in the Moodle course room. (You may need to increase the “maximum file size” in the course.)
If you want to record a new video with Opencast, take a look at “Record videos” an.
Tip: Do you want to organize videos in series? Then you have to decide already when uploading the videos, in which series the video should belong. A later change is not possible.
Note: If you want to work with third-party material, please observe the applicable copyright law for this purpose.
1. click Add video.
2. area Event Metadata.
- Enter a title for the video (mandatory field). Optionally, additional metadata can be entered under “Show more…”.

picture: upload video and capture “event metadata”
In the Upload File section, upload either a Presenter Video (if you have a video file with a recording of a speaker or a movie) or a Presentation Video (if you have a video file with a recording of a slide presentation or a screencast).
4. after the file upload is complete, click the “Save Changes” button. Depending on the size of the video, the upload may take some time.

picture: The system reports the successful upload.
The video is automatically passed to the “Queue for transfer to Opencast”. Depending on the size of the video, it will take a few minutes for the video to be made available. Refresh the page (with F5 or Reload) to see the current status. However, you do not have to wait for the process.

picture: “Queue for transfer to Opencast” \
If the video is successfully uploaded, it will be listed in the “Videos available in this course” section.
| {:de:video:opencast:oc_uploadstatus.png?600 | }} |
|
| Status: | Orange clock: Video is currently still being processed (top line in the image). Green tick: Processing is complete (bottom line). | |
| Visibility: | The eye icon is used to show or hide individual videos in the course (important for “Add videos as series activity”). | |
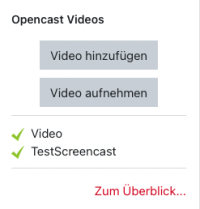
The “Opencast” block now displays the uploaded videos. However, the uploaded videos are not yet visible in the course, the step “Provide videos in course” follows.

picture: block “Opencast Videos” with videos. \
Record videos
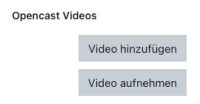
Start “Opencast Studio” via the block “Opencast Videos” (insert block if necessary) in the Moodle course room by clicking on “Record video”. Recording a video directly from Moodle has the advantage for you that the video is automatically assigned to your course in the background and stored there.
Download the video file for your own backup before uploading it to Opencast Studio. This is the only way to manually upload it afterwards if necessary (see uploading videos) or to post-process it in an external program.

picture: block “Opencast Videos”
1. click on Record video.
2. select the desired video source:
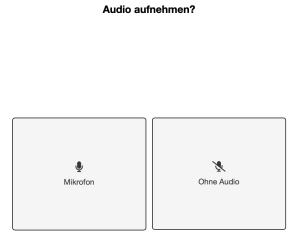
3. select whether to record with or without audio:
4. start the recording with the Record button:
5. stop the recording:
Before uploading, you can now download the video file locally (as an additional backup or for post-processing).
 \
picture: Opencast Studio - First “Download”, then “Upload”
After successful upload, the video will be processed in the background and made available in the Opencast Videos block.
Click on ““To the overview …” to get to the video overview. You can then provide the provisioning video in the course room.
Trim and edit videos
Video trimming is not actual editing - it just hides the segments marked for cutting. When you download your video, the parts removed in the previous step are still included.
Option 1: Trim video immediately after creation:
In the image you can see the following possible actions:
1. move beginning of recording \
2. move end of recording \
3. discard and record again \
4. continue to save \
Possibility 2: Trim video at a later time.
To trim an existing video, go to To Overview in the Opencast Videos block in your course view. In the column with the desired video under Actions, click the Cog and select Video Editor.
Using the crop marker, you can trim parts of the video. The Delete button removes marked areas.
When editing is complete, you can select the Processed menu item on the left. Now Save and Start Processing so that the changes are applied.
Share videos in the course
Videos that you have uploaded or recorded using the “Opencast Videos” block are not yet visible to students in the course.
There are currently two methods available for placing them in the course:
Note for Apple users: We recommend using the Mozilla Firefox browser, as it prevents Safari from setting the Opencast session cookie.
Adding a single video as an activity
1. in the Opencast block, select the At a Glance section.
2. click the Provide button to add a single video to a topic or course section.
3. In the following window, you have the option to customize the title of the video, add a description or make other settings. Enter details about the video and set certain requirements if necessary. For example, you could publish a solution video to a task only after a certain condition has been met by the participants.
Once you have finished, click one of the two red buttons to Save: Add activity and return to overview or Add activity and return to course.
You will see the link to the video in your course overview and can move it to another area if you wish. Clicking the link will open an external player to play the video.
Add videos as series activity
Include an entire course series in a topic or course section by clicking the small red “Add Opencast Series Activity to Course” button next to the series name.
In the following window you will have the option to customize the title of the series.
Once you have finished typing, click on one of the two red buttons to Save: Add Activity and Return to Overview or Add Activity and Return to Course.
You will see the link to the video series in your course overview and can move it to another area if you wish. When you click the link, a results list opens with all available videos. Click on a video to start the video player.
If you don't want to show certain videos temporarily, please change in the column “Visibility” the eye symbol. Videos noted here with a crossed out eye will not be shown to students in the series overview.
CC Licenses
You have the option to add a CC license to your videos.
Creative Commons copyright licenses and tools create a balance within the traditional environment of “All Rights Reserved” that comes from copyright law. CC licenses give everyone from individual creators to large companies and institutions a simple, standardized way to grant copyright permissions regarding their works.
Brief overview:
- CC BY: Attribution
- CC BY-SA: Attribution-ShareAlike
- CC BY-ND: Attribution-No Derivative Works
- CC BY-NC: Attribution-Noncommercial
- CC BY-NC-SA: Attribution-Noncommercial-ShareAlike
- CC BY-NC-ND: Attribution-Non-Commercial-No Derivative Works
More information on the various Creative Commons licenses can be found at creativecommons.org.
Tips and Tricks
- It is a good idea to create videos that are as short as possible or to break them up into sections. This is beneficial when updating content and saves time and effort when recording.
- Back up recorded video to your hard drive and/or a storage device.
- A good internet connection allows for faster uploading of videos.
- Example in Moodle course room ”Video in Teaching“


