Directory / Folder
If you want to make a large number of files available in your course, create a directory for them. Upload the files to the directory and structure everything clearly in subdirectories.
Upload several files as a packed ZIP archive and unpack them in the directory. A structure with subdirectories is also retained when transferring to a directory.
A directory can be used:
- for a series of files on a topic, e.g. a set of previous exam papers in PDF format or a collection of image files for use in participants' projects.
- to provide a shared upload area for teachers on the course site (where the directory remains hidden so that only teachers can see it).
Students upload files for everyone in the course
So that students can also upload files to a directory, they must be assigned the role “Student assistant (Studentische Hilfskraft)” or “Tutor” for the directory (only here!). This is how you assign students a role for a directory:
1. Change to the directory (click on it).
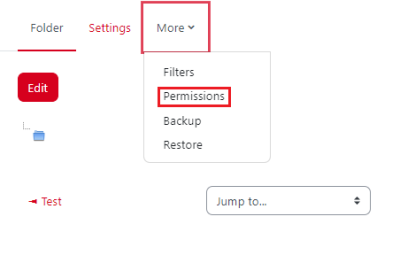
2. Under the tab “More” select “Permissions”.
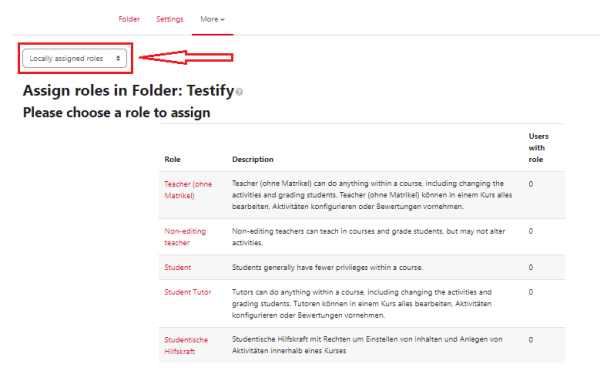
3. In the navigation bar change from “Permissions” to “Locally assigned roles”.
- Select one of the roles “Student assistant” or “Tutor”.
- Select the students in the “Potential users” column (hold down the CTRL key while selecting).
- Click on the “Add” button to assign the role.
You can then return to the main course page.


