Table of Contents
Client version
The application (“zoom client”) should always be up-to-date in order to be able to use new functions and receive security updates.
To check the client version and perform an update:
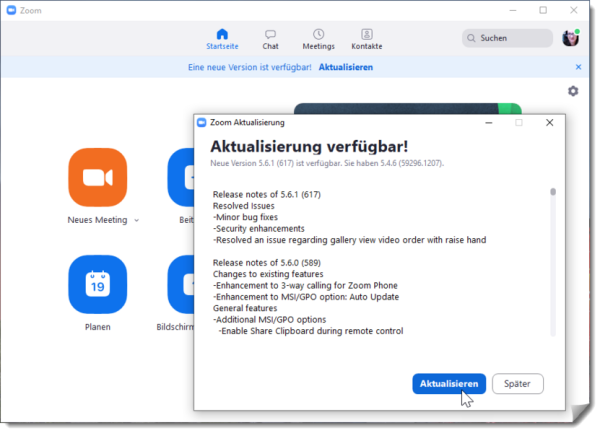
Check and update client version (Windows)
- Open the Zoom application (blue camera icon).
- Click on your profile picture in the top right-hand corner, a selection menu opens.
- Select “Check for updates”.
- If there is a new update, install it.
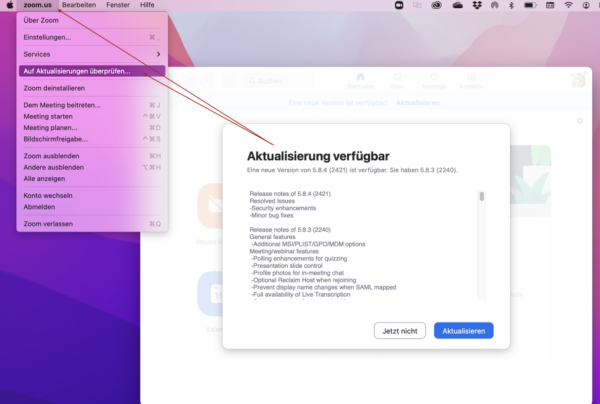
Check and update client version (Mac OS)
To check the client version and perform an update: Open the Zoom application (blue camera icon). In the top menu bar, go to > zoom.us and then > Check for updates.
Enable automatic updates of the Zoom Client (Recommended)
Since version 5.8.7 (November 2021), you can set automatic updates.
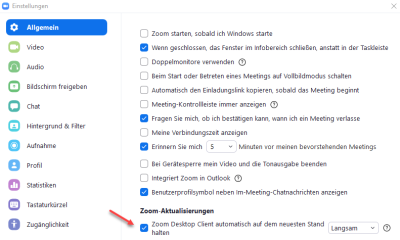
1. In the settings under “General” and “Zoom updates”, select the checkbox “Keep Zoom Desktop Client automatically up to date” to activate automatic updates.
2. When a new version of Zoom is available and you are not in a Zoom meeting, you will be prompted to update. If you are in a meeting, you will be prompted to update after the meeting has finished.
3. You can decide how often you want to receive updates. With the default setting “Slow”, you will not receive updates quite as often, the focus is on maximum stability (recommended). With the “Fast” setting, you can use the latest functions and updates as soon as they appear. You will receive important security updates in any case.


