This is an old revision of the document!
Table of Contents
Files
In moodle, files can be provided regardless of the file format. The presentation is done by the browser (e.g. text, images, video). However, if the file format cannot be displayed by the browser, students need the respective application program, e.g. MS Excel to open Excel files. It is recommended to provide documents in PDF format and images in JPG, PNG or SVG format.
Make files available in the course
1. To edit your course room, click the “Turn on editing” button in the upper right corner of the course room.
2. Drag and drop one or more files into the course room.
or
Click on “Add material or activity” > a dialog box will open.
3. Select the option “File” (scroll down if necessary) and confirm with Add > a form opens. Enter a name for the file (mandatory). Select a file with “Add file” or use the drag-and-drop function.
4. Save changes hitting “Save and display”.
Move multiple files at once and with folder structure: ZIP directory
If you want to upload multiple files to the course room at once, pack your files into a ZIP directory:
1. mark files e.g. in Windows Explorer.
2. right-click (context menu) on Winzip: “Add to ZIP archive”.
3. name the ZIP file and click “Add” button.
4. drag the ZIP file to the course room (in edit mode), a dialog box will open.
5. select “Unzip files …” to restore the individual files to a directory.
(The option “Include file” puts the ZIP file in the course room.)
Works also for moving folders into courses.
Delete a file
1. “Turn on editing”.
2. Click the X icon for “Delete” to the right of the old file.
3. Confirm the prompt.
Load file directly from CCS/NextCloud
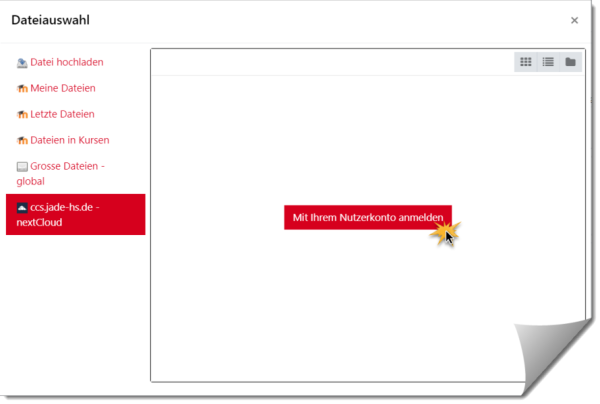
In the dialog “File Selection” you can upload files from your personal Collaboration Cloud Storage (CCS, NextCloud, see HRZ-Wiki) at Jade University.
This applies to making files available in the course room but also, for example, to submitting files in the Activity "Assignment".
Procedure:
1. select the entry “ccs.jade-hs.de-nextCloud” in the file selection.
2. log in with your university credentials.
3. Select the desired file and confirm the dialogs.
Replace a file with a newer version
Procedure:
1. “Turn on editing”.
2. Click “Edit” and “Edit Settings” to the right of the old file.
3. Upload a new file.
4. Right click on the old file to delete it.
5. “Save and Go to Course”
Use one file in multiple places (alias function)
Scenario:
You want to use a particular file multiple times (in one or more courses), but only need to change it in one place.
Add the file to Moodle for the first time (to “My Files” or in a course). For each subsequent use, follow these steps:
Create link/alias.
1. Select “Create material or activity”.
2. Select the option “File” and confirm with “Add”, a form opens.
3. Area Basic entries:
Fill in the mandatory field Name* (this is the link to the file on the course interface).
4. Area Content:
Select “Add file”: the “File selection” dialog box will open.
Select “Own files” or (if you loaded the first file into a course) “Server files”, and there select the file. A dialog box opens.
5. Select “Create alias/link to file”, confirm with “Select file”.
Swap origin file.
To update the file (and its links), upload to the origin location the updated file with the same filename.
Confirm the “File already exists” dialog with “Overwrite”.

